Hey there, fellow spring folks! If you’ve ever tried ordering a compression spring and thought, “Wait, how do I even measure the outside diameter right?”—you’re not alone. As a compression spring supplier who’s been in this game for over a decade, I’ve seen way too many people mix up outside diameter (OD) with inner diameter, or mess up how to actually get an accurate measurement. One time, a guy ordered springs that were “10mm OD” and they turned out way too big because he measured the wire’s outside instead of the whole spring. Oops. Today, I’m breaking this down like I chat with my customers over coffee—no stuffy jargon, just straight-up, science-backed tips you can use. Compression Springs
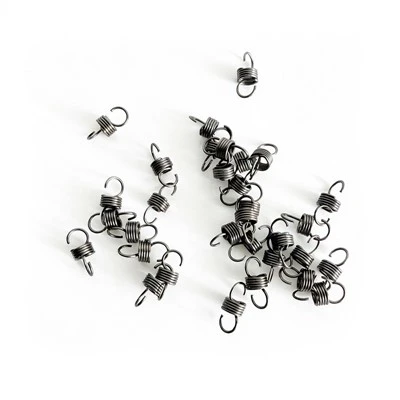
First off, let’s get the basics straight: what even is outside diameter for a compression spring? It’s the width of the spring’s widest part, right? Think of a hula hoop: the OD is the total diameter of the whole hoop, not the empty middle. For compression springs, this is super critical because if the OD is wrong, your spring won’t fit into the hole it’s supposed to sit in, or it’ll rub against the surrounding parts when it compresses. I’ve had clients tell me their machines jam all the time just because they guessed the OD instead of measuring it properly.
So, how do you actually measure it? Let’s start with the tools—you don’t need a fancy lab (unless you’re doing super precise stuff, but most of us don’t). The go-to’s are a digital caliper (way easier than a vernier for most people, no eye strain), a micrometer (great for small springs), and a ruler works in a pinch but it’s less accurate. Wait, but hold on—there’s a right way to use these tools, not just slapping them on the spring.
Here’s the first mistake almost everyone makes: measuring at the wrong spot. Compression springs are coils, so they’re not perfectly round all the way around—especially if they’re been stored for a while, or used in a past project where they got squished a bit. You need to measure across the two farthest points of the spring. If your caliper has jaws, open them wide enough to fit over the top of the spring, then adjust until they touch the outer edge on both sides. Don’t squeeze too hard—you’ll squish the coils and get a smaller, wrong measurement. The caliper’s digital screen will give you the number in inches or millimeters, depending on what you use. Pro tip: take 3-5 measurements around the spring—top, middle, bottom, and even a spot near the ends. If there’s a difference of a few tenths of a millimeter, that’s normal, but you should average them to get the true OD. Why? Because springs can have a little “runout” (wobble) from the winding process. When we wind springs on our machines, sometimes a tiny variation happens, so measuring only once is risky.
What about small springs? Like the ones used in pens or tiny electronics. A micrometer is better here because digital calipers might have a jaw size that’s too big, or you’ll accidentally bend the spring. A micrometer’s anvil and spindle fit right on the outer coils, and it’s more precise—usually down to 0.01mm, which is perfect for small stuff. Again, same rule: measure across the two widest points, not just one side.
Wait, what if you don’t have a caliper or micrometer? Maybe you’re in a garage with just a ruler. Hold the spring up to a flat surface, then place a straight edge (like a credit card) across the top of the spring. Measure from the edge of the straight edge on one side to the other on the flat surface. This is less accurate, but it works for quick checks. Just don’t do this for parts that need to fit into a tight space—you’ll regret it when your spring is too big.
Now, let’s talk about something a lot of people don’t realize: the difference between OD and inner diameter (ID) and mean diameter. Inner diameter is the hole in the middle, right? If you have a spring with a wire thickness of, say, 1mm, and an OD of 10mm, the ID is 10mm minus twice the wire thickness (so 8mm). Mean diameter is the middle ground between OD and ID—used for spring calculations, but most of you ordering springs care about OD because that’s what fits your assembly. Mixing up ID and OD is the #1 mistake I see. A customer once ordered springs with a 15mm ID, but they needed a 15mm OD. The springs were way too small to fit their housing, and they had to rush a new order. Save yourself the hassle: when you’re ordering, specify OD clearly, not ID.
Another thing: end coils. Wait, does the way the spring ends matter for OD? Yeah, a little. If your spring has closed and squared ends (the most common type for compression springs), the ends are ground flat, so they might be a tiny bit different in OD than the main coils. That’s why measuring across the main body (the middle, not the ends) is better. If you measure at the end, you might get a reading that’s off by 0.1mm or so, which can add up for tight tolerances.
What about tolerance? When we make springs, we have a standard tolerance for OD, usually ±0.1mm to ±0.5mm depending on the spring size and material. But if you need a super precise fit, you should ask for a tighter tolerance, like ±0.05mm. How does that affect measurement? If you’re checking a spring we made, you should measure to see if it falls within that tolerance. For example, if we say a spring has a 10mm OD with ±0.1mm, it can be 9.9mm or 10.1mm and still be correct. That’s important to remember—don’t panic if your measurement is a tiny bit off; it might just be within the allowed tolerance.
Let me throw in a quick real example. Last month, a customer came to me upset because the springs we shipped had an OD that “wasn’t 10mm.” He measured it with a ruler and got 9.8mm. Turns out, he measured across the inside of the coils, not the outside—so he was actually measuring ID, not OD. Once we walked him through how to use the caliper right, he found the OD was 10.05mm, which was spot on. That’s the kind of mix-up that costs both sides time.
Now, some science stuff to back this up—no, I won’t bore you with college-level physics, but here’s why measuring OD correctly matters. Compression springs work by storing energy when you compress them, right? The OD affects how the spring deflects (how much it compresses under load) and how it fits in the assembly. If the OD is too big, it’ll bind against the housing instead of compressing smoothly, which can cause the spring to break over time. If it’s too small, it might wobble, wear out faster, or not provide the right amount of force. So getting the measurement right isn’t just a paperwork thing—it’s about your part’s durability and performance.
Wait, what about different materials? Does that change how you measure OD? No, not really—whether it’s steel, stainless steel, titanium, or even plastic, the measurement method is the same. But keep in mind that some materials can stretch or deform if you squeeze too hard, so be gentle when using your tools. For soft materials like phosphor bronze, don’t crank the caliper tight—you’ll flatten the coils and get a wrong small number.
Let’s recap the steps to make it super simple, no notes needed:
- Grab your tool of choice (digital caliper, micrometer, or ruler). Calipers are best for most jobs.
- Pick the main body of the spring (not the ends) where coils are most consistent.
- Open your tool wide enough to reach the two farthest outer edges of the spring.
- Gently close the tool until it touches the outer coils on both sides—no squishing!
- Take the measurement.
- Repeat 3-5 times at different spots, then average them.
- Double-check that you’re measuring the outside, not the inside, of the coils.
Common mistakes to avoid:
- Measuring only once (springs have small wobbles, so one measurement might be off).
- Squeezing the tool too tight (deforms coils = wrong number).
- Mixing up OD and ID (so easy to do—just remember: OD is outside, ID is inside).
- Measuring at the ends (closed/squared ends might have a slightly different OD than the main body).
Now, if you’re ordering custom compression springs, how does this work when you’re giving specs? Just tell us the OD you need, along with wire thickness, free length, and number of coils. If you have a housing where the spring will sit, measure the inside diameter of that housing—your spring’s OD needs to be a tiny bit smaller (usually 0.1mm to 0.5mm) to fit snugly without rubbing. That way, you don’t have to worry about it being too big.
I know this might seem like a small detail, but as someone who’s made thousands of compression springs, getting the OD right is half the battle. I’ve seen projects get delayed, machines break, and customers lose money all because someone measured wrong. So save yourself the headache—follow these steps, and you’ll have springs that fit perfectly every time.
If you’re not sure about your measurement, or if you need custom springs tailored to your project, hit us up to chat. We can help you figure out the right specs, answer any questions you have about measurement, or get a quote for whatever springs you need. Don’t guess—get it right the first time, so your project runs smoothly.

Happy spring measuring!
Extension Springs References:
- ASME B18.2.3.1M, Compression Springs for General Purpose Applications.
- Spring Manufacturers Institute (SMI), Technical Manual for Compression Spring Design and Measurement.
- Machinery’s Handbook, 31st Edition, Spring Measurement and Tolerance Specifications.
Wenzhou Huajie Precision Spring Co., Ltd.
As one of the most professional compression springs manufacturers and suppliers in China, our products have good reputation in the market. Please rest assured to wholesale bulk compression springs in stock here and get pricelist from our factory. We also accept customized orders.
Address: No.6 Chuangsan Road, Lingang Industrial Zone, Yueqing, Wenzhou City, Zhejiang Province, China.
E-mail: ZGhuajieTH@163.com
WebSite: https://www.huajiespring.com/
